Custom Admin UI Pages
Getting Started
In this guide we'll show you how to add custom pages to the Keystone Admin UI. As the Admin UI is built on top of Next.js, it exposes the same pages directory for adding custom pages.
Getting started
To create a custom page, ensure that the admin/pages directory exists in the root of your Keystone Project.
Much like with Next.js, all files in this directory will be added as routes to the Admin UI.
The default export of every file in this directory is expected to be a valid React Component rendered out as the contents of the route.
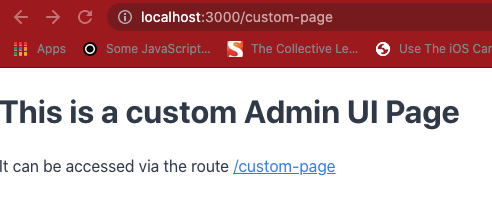
// admin/pages/custom-page.tsxexport default function CustomPage () {return (<><h1>This is a custom Admin UI Page</h1><p>It can be accessed via the route <a href="/custom-page">/custom-page</a></p></>)}
Not all Next.js exports are available: Keystone only supports the page component as a default export in the pages directory. This means that unlike with Next, auxillary exports such as getStaticProps and getServerProps are not supported.
With this in place, we now have a nice simple custom Admin UI page at http://localhost:3000/custom-page.

Adding Admin UI layout
At the moment this page is pretty bare bones. We want our page to look more like an Admin UI page.
Keystone helps us do this via the PageContainer component exported from @keystone-next/keystone/admin-ui/components.
The PageContainer component takes a header prop, which is expected to be a ReactElement.
This header prop is rendered out as the page title at the top of the page.
// admin/pages/custom-page.tsximport { PageContainer } from '@keystone-next/keystone/admin-ui/components';export default function CustomPage () {return (<PageContainer header="Custom Page"><h1>This is a custom Admin UI Page</h1><p>It can be accessed via the route <a href="/custom-page">/custom-page</a></p></PageContainer>)}
With the above snippet, our custom page looks a lot more like the other pages in the Admin UI.

There's still a problem though, the header doesn't look right. If we compare the header of our custom page with the header for the Dashboard, there's quite a bit of difference in the styling and font-weight.

Keystone pages leverage the Heading component from the @keystone-ui/core package to style the header, so let's use this to give our header the same styling.
// admin/pages/custom-page.tsximport { PageContainer } from '@keystone-next/keystone/admin-ui/components';import { Heading } from '@keystone-ui/core';export default function CustomPage () {return (<PageContainer header={<Heading type="h3">Custom Page</Heading>}><h1>This is a custom Admin UI Page</h1><p>It can be accessed via the route `/custom-page`</p></PageContainer>)}
Much better, our custom page looks and feels like an Admin UI page now.

Custom route in Admin UI Navigation
Yes, our custom page is looking pretty great, and much more like an Admin UI page, but it's not visible as a navigation item. We can fix this by adding a custom Navigation component with a route pointing to our custom page.
First add the following files to the /admin directory in the root of your Keystone project.
// admin/config.tsimport type { AdminConfig } from '@keystone-next/keystone/types';import { CustomNavigation } from './components/CustomNavigation';export const components: AdminConfig['components']= {Navigation: CustomNavigation};
// admin/components/CustomNavigation.tsximport { NavigationContainer, ListNavItems, NavItem } from '@keystone-next/keystone/admin-ui/components';import type { NavigationProps } from '@keystone-next/keystone/admin-ui/components';export function CustomNavigation({ lists, authenticatedItem }: NavigationProps) {return (<NavigationContainer authenticatedItem={authenticatedItem}><NavItem href="/">Dashboard</NavItem><ListNavItems lists={lists} /></NavigationContainer>)}
You will need to restart your Keystone system after adding admin/config.ts for the custom Navigation component to be loaded.
If you're interested in more details on creating a custom Navigation component check out the Custom Admin UI Navigation guide.
Lastly we'll add our new route to the newly created CustomNavigation component.
// admin/components/CustomNavigation.tsximport { NavigationContainer, ListNavItems, NavItem } from '@keystone-next/keystone/admin-ui/components';import type { NavigationProps } from '@keystone-next/keystone/admin-ui/components';export function CustomNavigation({ lists, authenticatedItem }: NavigationProps) {return (<NavigationContainer authenticatedItem={authenticatedItem}><NavItem href="/">Dashboard</NavItem><ListNavItems lists={lists} /><NavItem href="/custom-page">Custom Page</NavItem></NavigationContainer>)}
Under the hood Keystone's Admin UI is powered by Next.js, so the route to our custom page is the filename of our custom page component. In this case it's /custom-page.
With all that in place, our custom Admin UI page is now navigable from the Admin UI Navigation component, and we can access it from other pages in the Admin UI.

Styling
There are other styling considerations when adding a custom page to the Admin UI that go beyond making it look and feel like an Admin UI page.
For this, we recommend using the jsx runtime export from the @keystone-ui/core package, as this will ensure that the version of emotion you're using conforms with the version of emotion used internally used by Keystone.
The snippet below uses the emotion jsx runtime exported from @keystone-ui/core to help add some basic allignment and layout styling to the contents of our Admin UI custom page.
// admin/pages/custom-page.tsx/** @jsxRuntime classic *//** @jsxRuntime classic *//** @jsx jsx */import { jsx } from '@keystone-ui/core';import { PageContainer } from '@keystone-next/keystone/admin-ui/components';import { Heading } from '@keystone-ui/core';export default function CustomPage () {return (<PageContainerheader={(<Heading type="h3">Custom Page</Heading>)}><h1 css={{width: '100%',textAlign: 'center',}}>This is a custom Admin UI Page</h1><p css={{ textAlign: 'center' }}>It can be accessed via the route <a href="/custom-page">/custom-page</a></p></PageContainer>)}
Using emotion for styling is purely a recommendation, if you would prefer to use another css-in-js or css solution for your custom component please feel free to. This may require additional configuration currently outside of the scope of this guide.
Related resources
Example: Custom Admin UI Pages →
Adds a custom page in the Admin UI. Builds on the Task Manager starter project.
Custom Admin UI Logo Guide →
Learn how to add your own custom logo to Keystone’s Admin UI.
Custom Admin UI Navigation Guide →
Learn how to create your own custom Navigation components in Keytone’s Admin UI.